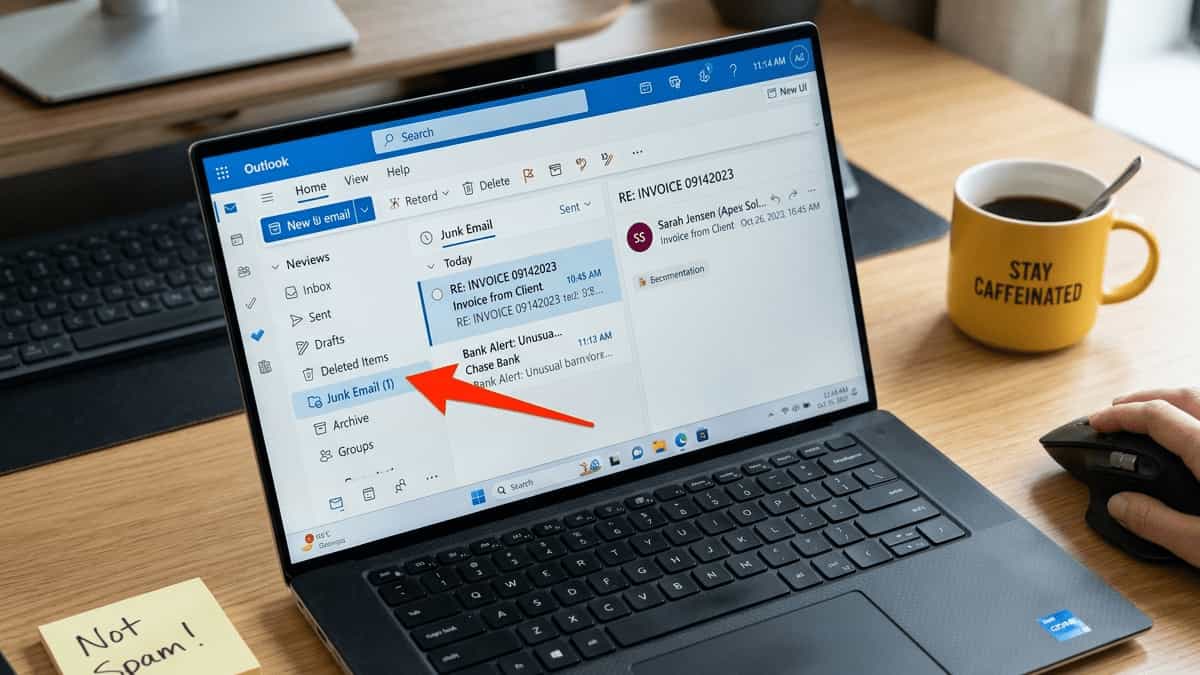
Few things are more frustrating than missing an important email because Outlook mistakenly dropped it into the Junk Email folder. You check your inbox, see nothing, and later discover that a client’s quote, a bank alert, or a colleague’s message was sitting in Junk all along.
This guide explains why legitimate emails end up in Outlook’s Junk folder and provides proven fixes to stop it from happening again – whether you use Classic Outlook (desktop app) or the New Outlook for Windows.
First, check your Focused Inbox: Sometimes emails aren’t in Junk – they’re just in the Other tab of the Focused Inbox. If you don’t see a message, click Other at the top of your inbox before diving into Junk fixes.
📌 Why Does Outlook Send Good Emails to Junk?
Outlook uses a built‑in Junk Email Filter that evaluates incoming messages based on several factors:
- Sender’s email address and domain reputation.
- Content that resembles spam (excessive links, certain keywords, formatting).
- The sender’s domain lacks proper email authentication – check your domain’s DNS records for SPF, DKIM, and DMARC. This is especially critical because Google and Yahoo enforced strict bulk sender requirements in 2024‑2025.
- The sender is not in your Safe Senders List.
- The sender is accidentally in your Blocked Senders List.
- Overly aggressive filter settings.
Sometimes the filter is too strict – and that’s when legitimate emails get misclassified.
🛠️ 8 Proven Fixes for Legitimate Emails Going to Junk
1. Mark the Message as “Not Junk” (Train Outlook)
The fastest way to teach Outlook that a sender is safe:
- Open your Junk Email folder.
- Right‑click the legitimate email.
- Select Junk → Not Junk.
- In the pop‑up dialog, check “Always trust email from [sender address]” and click OK.
This automatically adds the sender to your Safe Senders List.
For New Outlook: Right‑click the message → Junk → Not Junk. The interface is slightly different but the same logic applies.
2. Manually Add Senders to Safe Senders List
If emails keep going to Junk despite marking them as safe:
Classic Outlook:
- Go to Home tab → Junk → Junk E‑mail Options.
- Click the Safe Senders tab.
- Click Add and type the email address or domain (e.g.,
@contoso.com). - Click OK twice.
New Outlook:
- Click the Settings (gear icon) → Mail → Junk email.
- Under Safe senders and domains, click Add and enter the address or domain.
- Click Save.
Pro Tip: Add entire domains you trust (like
@yourbank.com) to catch all emails from that company.
3. Check Your Blocked Senders List
Sometimes you or an add‑in accidentally added a legitimate sender to the Blocked list.
- Classic Outlook: Junk E‑mail Options → Blocked Senders tab → remove any wrong entries.
- New Outlook: Settings → Mail → Junk email → Blocked senders and domains.
4. Lower the Junk Email Filter’s Aggressiveness
Outlook’s filter has four levels. “High” or “Safe Lists Only” can trap good emails.
Classic Outlook:
- Junk E‑mail Options → Options tab.
- Select Low (catches obvious spam only) or No Automatic Filtering (disables filtering – you can still use block lists).
New Outlook: The filter level is managed by Microsoft’s cloud; you can’t change it directly, but adding senders to Safe Senders effectively overrides it.
5. Disable “Automatically Filter Junk Email” for POP/IMAP Accounts
If you use a POP or IMAP account (like Gmail or Yahoo) in Outlook, the server‑side spam filter may interfere.
Classic Outlook (old Control Panel style):
- Go to File → Account Settings → Account Settings.
- Select your account → Change.
- Under Internet E‑mail Settings, click More Settings.
- Go to Advanced tab and uncheck “Automatically filter junk e‑mail”.
- Click OK → Next → Finish.
Note for modern Outlook versions (Microsoft 365, New Outlook): The “More Settings” button may not exist. Instead, your POP/IMAP account’s junk filtering is controlled by your email provider (Gmail, Yahoo, etc.). Log into your provider’s webmail and adjust their spam filter settings there.
6. Whitelist the Sender via Exchange/Office 365 Admin (For Work Accounts)
If you use Outlook with Microsoft 365 or Exchange, your IT admin can set a mail flow rule to bypass spam filtering for specific senders or domains. Contact your admin and provide the legitimate email addresses.
7. Ask the Sender to Authenticate Their Email
Many false positives happen because the sender’s domain lacks proper SPF, DKIM, and DMARC records. As of 2024‑2025, Google and Yahoo require bulk senders to authenticate – otherwise, emails are more likely to be marked as spam or rejected.
You can’t fix that yourself, but you can politely ask the sender to set up email authentication. It benefits everyone.
8. The Shared Hosting “Bad Neighbor” Problem
- Collateral Damage: On shared hosting, all outgoing emails use the same IP address. If a “neighbor” on your server sends spam, the IP’s reputation drops for everyone, even if you follow all the rules.
- Not Always on Public Lists: A server can have a “poor” reputation simply from being new or from high complaint rates, even if it’s not on a public blacklist. This poor reputation alone can cause emails to go to junk.
- “Noisy Neighbors”: Other factors like outdated software on a neighbor’s account can cause them to send out spam without their knowledge, further damaging the shared IP.
🔍 How to Check Your Server’s IP Reputation
If you suspect your shared hosting IP might be the culprit, here are some tools to diagnose the problem:
- Find Your IP: First, you need to know your server’s IP address. You can find this in your cPanel dashboard or by sending an email to yourself and checking the full message headers.
- Run a Blacklist Check: Use a tool like MXToolbox to check your IP address against over 100 DNS-based blackhole lists (DNSBLs), including major ones like Spamhaus.
- Check Your Sender Score: Visit SenderScore.org to get a reputation score for your IP. A low score here indicates potential problems with email providers.
🛠️ How to Fix a Blacklisted IP or Low Reputation
If you discover your shared IP is blacklisted, you will need to take action:
- Request Delisting: If your IP is on a public blacklist like Spamhaus, you will need to follow the specific “delisting” process for that list.
- Contact Your Hosting Provider: If your IP has a low reputation but isn’t on a public list, reach out to your hosting provider. They are often the only ones who can request IP “reputation warming” from large providers like Microsoft.
- Switch to a Dedicated IP or SMTP Relay: For the most reliable solution, consider upgrading to a plan with a dedicated IP address. Alternatively, route your emails through an SMTP relay service like SendGrid or Mailgun, which have their own excellent sending reputations and provide analytics to monitor your deliverability.
🔁 How to Recover Already Moved Emails
If you have already lost emails to the Junk folder:
- Open the Junk Email folder.
- Select all legitimate messages (Ctrl+Click or Shift+Click).
- Drag them to your Inbox or another folder.
- Right‑click any selected message → Junk → Not Junk → check “Always trust…” → OK.
This moves them and trains Outlook at the same time.
⚙️ Advanced: Reset Outlook’s Junk Filter Rules (Registry)
If the problem persists across many senders, the junk filter rule set may be corrupted.
Warning: Editing the registry can harm your system if done incorrectly. Proceed carefully. This fix applies only to the Classic Outlook Desktop app – New Outlook settings are stored in the cloud.
- Close Outlook.
- Press
Win + R, typeregedit, press Enter. - Navigate to:
- For Outlook 2016/2019/2021/Microsoft 365 (Classic):
HKEY_CURRENT_USER\Software\Microsoft\Office\16.0\Outlook\Junk Email - For older versions, replace
16.0with your version number.
- Delete the entire Junk Email folder (key).
- Restart Outlook – the junk filter will be recreated with default settings.
🚫 What NOT to Do
- Don’t disable the Junk Email filter completely unless you have another spam filter (like your email provider’s). You’ll drown in real spam.
- Don’t add “@” to Safe Senders – that disables all filtering and is unsafe.
- Don’t ignore the Junk folder – check it regularly, especially after changing settings.
🔗 Related Outlook Help Articles from Mukunda Software
We’ve written detailed guides for many other Outlook issues. Here are a few that might help you further:
- 👉 Fix Outlook Error 0x800ccc0e – Cannot Connect to Server
- 👉 Fix MSOutlook Not Sending or Receiving Emails – Complete Guide
- 👉 What is NormalEmail.dotm in Outlook? – Template Explained
- 👉 Fix MSOutlook Runs Slowly or Crashes – Oversized PST File Performance
- 👉 Fix Outlook Error 0x80042109 – SMTP Connection Failure
💎 Summary & Final Tips
| Problem | Quick Fix (Classic Outlook) | Quick Fix (New Outlook) |
|---|---|---|
| One specific sender’s emails go to Junk | Add to Safe Senders List (Junk Options) | Add via Settings → Mail → Junk email |
| Many legitimate emails go to Junk | Lower filter to Low or No Automatic Filtering | Not directly – rely on Safe Senders |
| POP/IMAP account issues | Uncheck “Automatically filter junk e‑mail” (if available) | Manage via provider’s webmail |
| Corrupted rules | Delete registry key under Junk Email | N/A (cloud‑stored) |
| Work account problems | Ask IT admin to whitelist sender | Same – admin controls apply |
Final advice: After applying any fix, ask a friend or colleague to send you a test email. Check both your Inbox and Junk folder. If it lands correctly, you’re done. If not, try the next solution.
❓ Frequently Asked Questions
Q: Will adding a sender to Safe Senders also whitelist them on my phone?
A: Yes – Safe Senders syncs with Exchange/Outlook.com accounts across all devices.
Q: Why does Outlook keep moving emails from my own domain to Junk?
A: Your domain might lack proper SPF/DKIM records. Also check if your own email address is accidentally in Blocked Senders.
Q: Can an add‑in cause false junk filtering?
A: Yes – some third‑party anti‑spam add‑ins override Outlook’s filter. Try disabling add‑ins temporarily to test.
Q: What’s the difference between Junk and Focused Inbox “Other” tab?
A: Junk is for spam. The Other tab (Focused Inbox) is for non‑urgent but legitimate emails. Always check Other first before assuming an email is lost.